热更新实现原理
启动
当运行webpack serve命令时,解析命令后会加载node_modules/@webpack-cli/serve/lib/index.js中的ServeCommand,并执行其apply方法,最后触发回调函数,精简后的代码如下:
// 1. 创建 compiler
const compiler = await cli.createCompiler(webpackCLIOptions);
// 2. 加载 webpack-dev-server 包
const DevServer = require(WEBPACK_DEV_SERVER_PACKAGE);
// 3. 整理所有 compilers
const compilers = typeof compiler.compilers !== "undefined" ? compiler.compilers : [compiler];
const possibleCompilers = compilers.filter((compiler) => compiler.options.devServer);
const compilersForDevServer = possibleCompilers.length > 0 ? possibleCompilers : [compilers[0]];
// 4. 遍历所有 compilers
for (const compilerForDevServer of compilersForDevServer) {
  // 5. 提取 devServer 配置
  const result = Object.assign({}, (compilerForDevServer.options.devServer || {}));
  devServerOptions = result;

  try {
    let server;
    // 6. 运行 devServer
    server = new DevServer(devServerOptions, compiler);
    if (typeof server.start === "function") {
      await server.start();
    }
    servers.push(server);
  }
}
webpack-dev-server
找到node_modules/webpack-dev-server/lib/Server.js文件中的start函数,精简后的代码如下:
async start() {
  // 1. 整理 options
  await this.normalizeOptions();
  // 2. 初始化
  await this.initialize();
  // 3. 监听请求
  await new Promise((resolve) => {
    this.server.listen(listenOptions, () => {
      resolve();
    });
  });
 // 4. 创建 websocket server
  if (this.options.webSocketServer) {
    this.createWebSocketServer();
  }
}其中最核心的是初始化过程,下面着重讲解initialize方法。
添加client端socket代码
initialize方法首先执行addAdditionalEntries方法:
// 添加 client socket 代码
additionalEntries.push(
  `${require.resolve("../client/index.js")}?${webSocketURL}`
);

// 添加 webpack dev-server 代码
if (this.options.hot === "only") {
  hotEntry = require.resolve("webpack/hot/only-dev-server");
} else if (this.options.hot) {
  hotEntry = require.resolve("webpack/hot/dev-server");
}
additionalEntries.push(hotEntry);

// 应用 entry
if (typeof webpack.EntryPlugin !== "undefined") {
  for (const additionalEntry of additionalEntries) {
    new webpack.EntryPlugin(compiler.context, additionalEntry, {
      name: undefined,
    }).apply(compiler);
  }
}该函数的主要作用是添加了两个entry,相当于最终打包出来的bundle文件会引入这两个entry对应的代码。
client/index.js
首先是../client/index.js文件:
// client/index.js 文件
// 创建了 WebSocket 客户端
var socketURL = createSocketURL(parsedResourceQuery);
socket(socketURL, onSocketMessage);

// client/socket.js 文件
var Client =
    typeof __webpack_dev_server_client__ !== "undefined" ?
    typeof __webpack_dev_server_client__.default !== "undefined" ? __webpack_dev_server_client__.default : __webpack_dev_server_client__ : WebSocketClient;

var socket = function initSocket(url, handlers) {
  client = new Client(url);
  client.onOpen(function () {});
  client.onClose(function () {});
  client.onMessage(function (data) {});
};

export default socket;该文件的核心是创建了一个WebSocket的客户端,用于接收服务端传递的信息。
webpack/hot/dev-server.js
其次是dev-server.js文件:
if (module.hot) {
  var check = function check() {
    module.hot
      .check(true)
      .then(function (updatedModules) {})
      .catch(function (err) {});
  };
  var hotEmitter = require("./emitter");
  hotEmitter.on("webpackHotUpdate", function (currentHash) {
    lastHash = currentHash;
    if (!upToDate() && module.hot.status() === "idle") {
      log("info", "[HMR] Checking for updates on the server...");
      check();
    }
  });
}该代码的核心逻辑是监听webpackHotUpdate事件,触发check方法的执行。
小结
addAdditionalEntries通过添加两个entry,在bundle里添加了WebSocket客户端代码,使得客户端具备接收服务端消息的能力。
提供__webpack_dev_server_client__
添加完entry后,接着调用ProvidePlugin:
new webpack.ProvidePlugin({
  __webpack_dev_server_client__: this.getClientTransport(),
}).apply(compiler);该插件相当于为全局提供了变量。这就意味着bundle.js文件里的代码可以访问__webpack_dev_server_client__变量,而this.getClientTransport()方法则是提供客户端的socket代码,这里默认使用的是WebSocket。我们在上面entry中的client/index.js文件中使用到了这个变量。
HotModuleReplacementPlugin
其次是应用HotModuleReplacementPlugin插件:
const plugin = new webpack.HotModuleReplacementPlugin();

plugin.apply(compiler);该插件定义在webpack/lib/HotModuleReplacementPlugin.js文件中。下面我们分析一下其作用。
1. 处理热更新api
首先会定义module.hot相关api的dependency以及template:
//#region module.hot.* API
compilation.dependencyFactories.set(
  ModuleHotAcceptDependency,
  normalModuleFactory
);
compilation.dependencyTemplates.set(
  ModuleHotAcceptDependency,
  new ModuleHotAcceptDependency.Template()
);
compilation.dependencyFactories.set(
  ModuleHotDeclineDependency,
  normalModuleFactory
);
compilation.dependencyTemplates.set(
  ModuleHotDeclineDependency,
  new ModuleHotDeclineDependency.Template()
);然后监听parser阶段,对module.hot等api进行解析,例如:
parser.hooks.call
  .for("module.hot.accept")
  .tap(
  "HotModuleReplacementPlugin",
  createAcceptHandler(parser, ModuleHotAcceptDependency)
);因此module.hot等api经过parser后会变为相应的dependency。在code generate时,调用对应的template生成新的代码:
// 转换前
if (module.hot) {
  module.hot.accept(['./moduleB.js'], () => {
    console.log('======>  accept B')
  })
}

// 转换后
if (true) {
  module.hot.accept([/*! ./moduleB.js */ "./src/moduleB.js"], __WEBPACK_OUTDATED_DEPENDENCIES__ => {
    /* harmony import */ _moduleB__WEBPACK_IMPORTED_MODULE_0__ = __webpack_require__(/*! ./moduleB.js */ "./src/moduleB.js");
    (() => {
      console.log('======>  accept B')
    })(__WEBPACK_OUTDATED_DEPENDENCIES__);
  })
}
2. hooks.additionalTreeRuntimeRequirements
在seal阶段,所有模块的代码生成之后,会调用additionalTreeRuntimeRequirements钩子,用于添加模块在代码生成时需要的runtime代码。如果使用到了热更新功能,那么会添加热更新相关的runtime代码:
compilation.hooks.additionalTreeRuntimeRequirements.tap(
  "HotModuleReplacementPlugin",
  (chunk, runtimeRequirements) => {
    runtimeRequirements.add(RuntimeGlobals.hmrDownloadManifest);
    runtimeRequirements.add(RuntimeGlobals.hmrDownloadUpdateHandlers);
    runtimeRequirements.add(RuntimeGlobals.interceptModuleExecution);
    runtimeRequirements.add(RuntimeGlobals.moduleCache);
    compilation.addRuntimeModule(
      chunk,
      new HotModuleReplacementRuntimeModule()
    );
  }
);注意这个时候添加了一个新的module为HotModuleReplacementRuntimeModule。在webpack/lib/hmr/HotModuleReplacementRuntimeModule.js中:
class HotModuleReplacementRuntimeModule extends RuntimeModule {
 constructor() {
  super("hot module replacement", RuntimeModule.STAGE_BASIC);
 }

 generate() {
  return Template.getFunctionContent(
   require("./HotModuleReplacement.runtime.js")
  )
   .replace(/\$getFullHash\$/g, RuntimeGlobals.getFullHash)
   .replace(
    /\$interceptModuleExecution\$/g,
    RuntimeGlobals.interceptModuleExecution
   )
   .replace(/\$moduleCache\$/g, RuntimeGlobals.moduleCache)
   .replace(/\$hmrModuleData\$/g, RuntimeGlobals.hmrModuleData)
   .replace(/\$hmrDownloadManifest\$/g, RuntimeGlobals.hmrDownloadManifest)
   .replace(
    /\$hmrInvalidateModuleHandlers\$/g,
    RuntimeGlobals.hmrInvalidateModuleHandlers
   )
   .replace(
    /\$hmrDownloadUpdateHandlers\$/g,
    RuntimeGlobals.hmrDownloadUpdateHandlers
   );
 }
}
在生成代码阶段会调用module.generate方法,所以HotModuleReplacementRuntimeModule模块最终生成的代码相当于require("./HotModuleReplacement.runtime.js")文件中的代码,然后用正则将$开头的一些变量替换后的代码。而这个文件的代码,正是热更新中更新过程的核心代码。
3. hooks.fullhash
待runtime代码也被添加之后,为项目生成新的fullhash,此时会调用hooks.fullhash钩子,触发HotModuleReplacementPlugin插件:
compilation.hooks.fullHash.tap("HotModuleReplacementPlugin", hash => {
  for (const chunk of compilation.chunks) {
    const modules = chunkGraph.getChunkModulesIterable(chunk);
    for (const module of modules) {
      if (fullHashModulesInThisChunk.has((module))) {
        if (records.fullHashChunkModuleHashes[key] !== hash) {
          updatedModules.add(module, chunk);
        }
        fullHashChunkModuleHashes[key] = hash;
      } else {
        if (records.chunkModuleHashes[key] !== hash) {
          updatedModules.add(module, chunk);
        }
        chunkModuleHashes[key] = hash;
      }
    }
  });
})这段代码有很多分支,这里做了精简处理。其核心作用是对比chunk中的module的hash值。如果与原来存放的hash不相等,那么将module/chunk添加到updatedModules中。因此,可以判别出哪些module产生了更新。
4. hooks.processAssets
在所有代码生成完成之后,调用hooks.processAssets钩子,触发HotModuleReplacementPlugin插件:
compilation.hooks.processAssets.tap(
  {
    name: "HotModuleReplacementPlugin",
    stage: Compilation.PROCESS_ASSETS_STAGE_ADDITIONAL
  },
  () => {
    for (const key of Object.keys(records.chunkHashes)) {
   // 新 module
      newModules = chunkGraph
        .getChunkModules(currentChunk)
        .filter(module => updatedModules.has(module, currentChunk));
      // 新 runtime module
      newRuntimeModules = Array.from(
        chunkGraph.getChunkRuntimeModulesIterable(currentChunk)
      ).filter(module => updatedModules.has(module, currentChunk));
      // 新 fullhash module
      const fullHashModules =
            chunkGraph.getChunkFullHashModulesIterable(currentChunk);
      newFullHashModules =
        fullHashModules &&
        Array.from(fullHashModules).filter(module =>
                                           updatedModules.has(module, currentChunk)
                                          );
      const dependentHashModules =
            chunkGraph.getChunkDependentHashModulesIterable(currentChunk);
      // 新 dependency module
      newDependentHashModules =
        dependentHashModules &&
        Array.from(dependentHashModules).filter(module =>
                                                updatedModules.has(module, currentChunk)
                                               );
      // 移除的 runtime module
      removedFromRuntime = subtractRuntime(oldRuntime, newRuntime);

      // ...
    }
  }
)首先会对chunk下的module的hash值进行对比。对比完成后,得到了更新的module。随后为这些更新后的module创建一个新的chunk,类型为HotUpdateChunk:
// 1. 创建 HotUpdateChunk
const hotUpdateChunk = new HotUpdateChunk();
// 2. 记录 chunk
ChunkGraph.setChunkGraphForChunk(hotUpdateChunk, chunkGraph);
hotUpdateChunk.id = chunkId;
hotUpdateChunk.runtime = newRuntime;
// 3. 添加到当前 chunkGroup
if (currentChunk) {
  for (const group of currentChunk.groupsIterable)
    hotUpdateChunk.addGroup(group);
}
// 4. 建立联系
chunkGraph.attachModules(hotUpdateChunk, newModules || []);
chunkGraph.attachRuntimeModules(
  hotUpdateChunk,
  newRuntimeModules || []
);
if (newFullHashModules) {
  chunkGraph.attachFullHashModules(
    hotUpdateChunk,
    newFullHashModules
  );
}
if (newDependentHashModules) {
  chunkGraph.attachDependentHashModules(
    hotUpdateChunk,
    newDependentHashModules
  );
}
// 5. 新增 chunk render
const renderManifest = compilation.getRenderManifest({
  chunk: hotUpdateChunk,
  hash: records.hash,
  fullHash: records.hash,
  outputOptions: compilation.outputOptions,
  moduleTemplates: compilation.moduleTemplates,
  dependencyTemplates: compilation.dependencyTemplates,
  codeGenerationResults: compilation.codeGenerationResults,
  runtimeTemplate: compilation.runtimeTemplate,
  moduleGraph: compilation.moduleGraph,
  chunkGraph
});
// 6. 生成代码,并进行 emit
for (const entry of renderManifest) {
  let filename;
  let assetInfo;
  if ("filename" in entry) {
    filename = entry.filename;
    assetInfo = entry.info;
  } else {
    ({ path: filename, info: assetInfo } =
     compilation.getPathWithInfo(
      entry.filenameTemplate,
      entry.pathOptions
    ));
  }
  const source = entry.render();
  compilation.additionalChunkAssets.push(filename);
  compilation.emitAsset(filename, source, {
    hotModuleReplacement: true,
    ...assetInfo
  });
  if (currentChunk) {
    currentChunk.files.add(filename);
    compilation.hooks.chunkAsset.call(currentChunk, filename);
  }
}
// 8. 记录更新的 runtime
forEachRuntime(newRuntime, runtime => {
  hotUpdateMainContentByRuntime
    .get(runtime)
    .updatedChunkIds.add(chunkId);
});具体的执行步骤已经注释,需要注意的是HotUpdateChunk在getRenderManifest时,此时filename获取的是outputOptions.hotUpdateChunkFilename:
// 调用getRenderManifest时触发
const filenameTemplate = JavascriptModulesPlugin.getChunkFilenameTemplate(chunk, outputOptions);
result.push({
  render,
  filenameTemplate,
  // ..
});

//  实际使用的是 getChunkFilenameTemplate 方法获取 filename
static getChunkFilenameTemplate(chunk, outputOptions) {
  if (chunk.filenameTemplate) {
    return chunk.filenameTemplate;
  } else if (chunk instanceof HotUpdateChunk) {
    return outputOptions.hotUpdateChunkFilename;
  } else if (chunk.canBeInitial()) {
    return outputOptions.filename;
  } else {
    return outputOptions.chunkFilename;
  }
}而在项目启动的初始化阶段,定义了一些属性,其中就包含hotUpdateChunkFilename:
D(output, "hotUpdateChunkFilename", `[id].[fullhash].hot-update.${output.module ? "mjs" : "js"}`);
D(output, "hotUpdateMainFilename", "[runtime].[fullhash].hot-update.json");这就是热更新时xxx.hot-update.js文件生成的实际位置,它包含了所有更新的模块的代码。
最后,根据更新的模块,将变动信息直接输出到xxx.hot-update.json文件当中。
// 添加 xxx-hot-update.json
for (const [
  filename,
  { removedChunkIds, removedModules, updatedChunkIds, assetInfo }
] of hotUpdateMainContentByFilename) {
  const hotUpdateMainJson = {
    c: Array.from(updatedChunkIds),
    r: Array.from(removedChunkIds),
    m:
    removedModules.size === 0
    ? completelyRemovedModulesArray
    : completelyRemovedModulesArray.concat(
      Array.from(removedModules, m =>
                 chunkGraph.getModuleId(m)
                )
    )
  };

  const source = new RawSource(JSON.stringify(hotUpdateMainJson));
  compilation.emitAsset(filename, source, {
    hotModuleReplacement: true,
    ...assetInfo
  });
}其中c代表更新的chunk id,r代表移除的chunk id,m代表移除的module。
5. hooks.record
最终会记录一些hash、id等相关信息:
compilation.hooks.record.tap(
  "HotModuleReplacementPlugin",
  (compilation, records) => {
    if (records.hash === compilation.hash) return;
    const chunkGraph = compilation.chunkGraph;
    records.hash = compilation.hash;
    records.fullHashChunkModuleHashes = fullHashChunkModuleHashes;
    records.chunkModuleHashes = chunkModuleHashes;
    records.chunkHashes = {};
    records.chunkRuntime = {};
    for (const chunk of compilation.chunks) {
      records.chunkHashes[chunk.id] = chunk.hash;
      records.chunkRuntime[chunk.id] = getRuntimeKey(chunk.runtime);
    }
    // ...
  }
);
小结
HotModuleReplacementPlugin的作用实际上有三个:
- 处理
module.hot.xxx等api,转换成新的代码。 - 对比
hash值,判断出哪些module/chunk更新。将更新的模块单独生成一个chunk,将代码输出到xxx.hot-update.js文件中。而将更新的信息输出到xxx.hot-update.json文件中。 - 添加
HotModuleReplacementRuntimeModule模块,供后续触发更新。
建立服务端server
webpack中使用express作为服务端框架为浏览器提供服务:
// 建立 server
this.setupApp();
// 检查请求头部信息
this.setupHostHeaderCheck();
// 创建 server
this.createServer();
// 监听
await new Promise((resolve) => {
  this.server.listen(listenOptions, () => {
    resolve();
  });
});在express的基础上,创建服务端的WebSocket,用于给客户端发送信息:
createWebSocketServer() {
  this.webSocketServer = new (this.getServerTransport())(this);
  this.webSocketServer.implementation.on("connection", (client, request) => {});
}因此,服务端通过express为客户端提供api服务,并通过WebSocket给客户端发送信息。
webpack-dev-middleware
在向express发送请求时,会经过webpack-dev-middleware中间件,它的调用在setupDevMiddleware中:
setupDevMiddleware() {
  const webpackDevMiddleware = require("webpack-dev-middleware");
  this.middleware = webpackDevMiddleware(
    this.compiler,
    this.options.devMiddleware
  );
}webpackDevMiddleware方法核心如下:
context.watching = context.compiler.watch(watchOptions, error => { });
const instance = (0, _middleware.default)(context); // API一是调用compiler.watch方法进行编译并监听文件变化,二是应用webpack-dev-middleware中间件。
在编译的过程中会调用前面提到的HotModuleReplacementPlugin,并且编译完成后触发hooks.done钩子。而在webpack-dev-server中,监听了hooks.done钩子:
setupHooks() {
  this.compiler.hooks.done.tap("webpack-dev-server", (stats) => {
    // 编译完成,发送给 server websocket
    if (this.webSocketServer) {
      this.sendStats(this.webSocketServer.clients, this.getStats(stats));
    }
    this.stats = stats;
  });
}此时会通过服务端server向所有客户端发送编译完成的消息,如"ok"。
来到webpack-dev-server/client/index.js,有接收消息的回调:
ok: function ok() {
  sendMessage("Ok");

  if (options.overlay) {
    hide();
  }

  reloadApp(options, status);
},此时触发reloadApp方法:
if (hot && allowToHot) {
  hotEmitter.emit("webpackHotUpdate", status.currentHash);
}最终触发webpackHotUpdate事件,而在webpack/hot/dev-server.js文件中,监听了该事件:
if (module.hot) {
  var check = function check() {
    module.hot
      .check(true)
      .then(function (updatedModules) {})
      .catch(function (err) {});
  };
  var hotEmitter = require("./emitter");
  hotEmitter.on("webpackHotUpdate", function (currentHash) {
    if (!upToDate() && module.hot.status() === "idle") {
      check();
    }
  });
}此时会调用module.hot.check(true)方法。
hotCheck
module.hot.check(true)方法对应于webpack/lib/hmr/HotModuleReplacement.runtime.js文件中的hotCheck方法,实际编译后的代码类似如下:
function hotCheck(applyOnUpdate) {
 return setStatus("check")
   // 1. 请求 xxx-hot-update.json 文件
  .then(__webpack_require__.hmrM)
  .then(function (update) {
   return setStatus("prepare").then(function () {
    var updatedModules = [];
    blockingPromises = [];
    currentUpdateApplyHandlers = [];
    // 2. 请求变更后的 chunks
    return Promise.all(
     Object.keys(__webpack_require__.hmrC).reduce(function (
      promises,
      key
     ) {
      __webpack_require__.hmrC[key](
       update.c,
       update.r,
       update.m,
       promises,
       currentUpdateApplyHandlers,
       updatedModules
      );
      return promises;
     },
     [])
    ).then(function () {
     return waitForBlockingPromises(function () {
      if (applyOnUpdate) {
              // 3. 进行热更新应用
       return internalApply(applyOnUpdate);
      } else {
       return setStatus("ready").then(function () {
        return updatedModules;
       });
      }
     });
    });
   });
  });
}
[fullhash].hot-update.json
__webpack_require__.hmrM对应的代码如下:
/* webpack/runtime/getFullHash */
(() => {
 __webpack_require__.h = () => ("a4c01381c6f871e5f847")
})();

/* webpack/runtime/get update manifest filename */
(() => {
 __webpack_require__.hmrF = () => ("index." + __webpack_require__.h() + ".hot-update.json");
})();

__webpack_require__.hmrM = () => {
  if (typeof fetch === "undefined") throw new Error("No browser support: need fetch API");
  return fetch(__webpack_require__.p + __webpack_require__.hmrF()).then((response) => {
    if(response.status === 404) return; // no update available
    if(!response.ok) throw new Error("Failed to fetch update manifest " + response.statusText);
    return response.json();
  });
};实际上它是根据fullhash来拼接更新信息的请求地址,然后发送请求。此时express接收到请求,通过webpack-dev-middleware中间件,在内存中读取[fullhash].hot-update.json文件,并返回给客户端。
[fullhash].hot-update.js
拿到更新信息后,通过__webpack_require__.hmrC方法加载更新后的chunk:
__webpack_require__.hmrC.jsonp = function (
 chunkIds,
 removedChunks,
 removedModules,
 promises,
 applyHandlers,
 updatedModulesList
) {
  applyHandlers.push(applyHandler);
  currentUpdateChunks = {};
  currentUpdateRemovedChunks = removedChunks;
  currentUpdate = removedModules.reduce(function (obj, key) {
    obj[key] = false;
    return obj;
  }, {});
  currentUpdateRuntime = [];
  chunkIds.forEach(function (chunkId) {
    if (
      __webpack_require__.o(installedChunks, chunkId) &&
      installedChunks[chunkId] !== undefined
    ) {
      // 根据 chunkId, 加载最新的 chunk
      promises.push(loadUpdateChunk(chunkId, updatedModulesList));
      currentUpdateChunks[chunkId] = true;
    }
  });
};其中loadUpdateChunk如下:
/* webpack/runtime/get javascript update chunk filename */
(() => {
  // This function allow to reference all chunks
  __webpack_require__.hu = (chunkId) => {
    // return url for filenames based on template
    return "" + chunkId + "." + __webpack_require__.h() + ".hot-update.js";
  };
})();

function loadUpdateChunk(chunkId) {
  return new Promise((resolve, reject) => {
    var url = __webpack_require__.p + __webpack_require__.hu(chunkId);
    // ...
    __webpack_require__.l(url, loadingEnded);
  });
}根据hot-update.json文件中的chunkId加载最新的chunk。加载完成后,实际是加载的变更后的module代码,类似如下:
self["webpackHotUpdatestudy_webpack"](
  // chunk id
  "index",
  // 更新的 module
  {
    "./src/moduleB.js":((module, __webpack_exports__, __webpack_require__) => {
      eval("xxxxx省略xxxxx");
    })
  },
  // 更新的 runtime
  function(__webpack_require__) {
    (() => {
      __webpack_require__.h = () => ("23e988120ea958e8108f")
    })();
  }
);而在入口文件中,定义了webpackHotUpdatestudy_webpack(该变量名称是根据项目名称定的):
self["webpackHotUpdatestudy_webpack"] = (chunkId, moreModules, runtime) => {
  for (var moduleId in moreModules) {
    if (__webpack_require__.o(moreModules, moduleId)) {
      currentUpdate[moduleId] = moreModules[moduleId];
      if (currentUpdatedModulesList) currentUpdatedModulesList.push(moduleId);
    }
  }
  if (runtime) currentUpdateRuntime.push(runtime);
  if (waitingUpdateResolves[chunkId]) {
    waitingUpdateResolves[chunkId]();
    waitingUpdateResolves[chunkId] = undefined;
  }
};最终更新的module和runtime会记录到currentUpdate和currentUpdateRuntime变量当中。
hotApply
得到更新后的代码后,接下来就需要根据用户定义的module.hot.xxx等api来进行热更新了。
module.hot相关api定义
// HotModuleReplacement.runtime.js 打包后
__webpack_require__.i.push(function (options) {
  var module = options.module;
  var require = createRequire(options.require, options.id);
  module.hot = createModuleHotObject(options.id, module);
  module.parents = currentParents;
  module.children = [];
  currentParents = [];
  options.require = require;
});

// 加载模块时,会执行 __webpack_require__.i,为 module.hot 赋值。
function __webpack_require__(moduleId) {
  var module = __webpack_module_cache__[moduleId] = {
    id: moduleId,
    loaded: false,
    exports: {}
  }
  var execOptions = { id: moduleId, module: module, factory: __webpack_modules__[moduleId], require: __webpack_require__ };
  __webpack_require__.i.forEach(function (handler) { handler(execOptions); });
  module = execOptions.module;
  execOptions.factory.call(module.exports, module, module.exports, execOptions.require);

  module.loaded = true;
  return module.exports;
}在模块加载时,执行__webpack_require__.i,此时会通过createModuleHotObject函数创建module.hot对象。因此可以正常访问到module.hot.xxx属性。
applyInvalidatedModules
首先是调用applyInvalidatedModules方法:
function applyInvalidatedModules() {
  if (queuedInvalidatedModules) {
    if (!currentUpdateApplyHandlers) currentUpdateApplyHandlers = [];
    Object.keys(__webpack_require__.hmrI).forEach(function (key) {
      queuedInvalidatedModules.forEach(function (moduleId) {
        __webpack_require__.hmrI[key](
          moduleId,
          currentUpdateApplyHandlers
        );
      });
    });
    queuedInvalidatedModules = undefined;
    return true;
  }
}queuedInvalidatedModules是在调用module.hot.invalidate方法时收集到的module:
// invalidate 方法调用时,收集 moduleId
invalidate: function () {
  switch (currentStatus) {
    case "apply":
      (queuedInvalidatedModules = queuedInvalidatedModules || []).push(
        moduleId
      );
      break;
  }
},循环后调用的是__webpack_require__.hmrI.jsonp:
__webpack_require__.hmrI.jsonp = function (moduleId, applyHandlers) {
  // 如果模块没有更新
  if (!currentUpdate) {
    currentUpdate = {};
    currentUpdateRuntime = [];
    currentUpdateRemovedChunks = [];
    applyHandlers.push(applyHandler);
  }
  // 如果更新的模块中不包含当前模块,那么将该模块添加到更新模块中
  if (!__webpack_require__.o(currentUpdate, moduleId)) {
    currentUpdate[moduleId] = __webpack_require__.m[moduleId];
  }
};
applyHandler
接下来是调用applyHandle,用于解析
var results = currentUpdateApplyHandlers.map(function (handler) {
  return handler(options);
});applayHandle的定义是在webpack/lib/hmr/JavascriptHotModuleReplacement.runtime.js文件中:
for (var moduleId in currentUpdate) {
  if (__webpack_require__.o(currentUpdate, moduleId)) {
    var newModuleFactory = currentUpdate[moduleId];
    var result;
    if (newModuleFactory) {
      result = getAffectedModuleEffects(moduleId);
    } else {
      result = {
        type: "disposed",
        moduleId: moduleId
      };
    }

    // ...
}该函数会遍历更新的module,然后通过getAffectedModuleEffects方法找到该module调用了module.hot的具体api。最后用outdatedModules记录所有需要更新的module,用outdatedDependencies记录parent和children之间需要更新的关系,如:
// outdatedModules
["./src/moduleB.js"]

// outdatedDependencies
{
  "./src/index.js": ["./src/moduleB.js"]
}
dispose
接着通过dispose方法移除旧的module或chunk:
results.forEach(function (result) {
  if (result.dispose) result.dispose();
});
类似如下操作:
dispose: function () {
  // 省略其他内容的删除
  while (queue.length > 0) {
    // ....
    delete __webpack_require__.c[moduleId];
    delete outdatedDependencies[moduleId];
  }
  // ....
}
apply
最后调用apply方法更新内容:
// 更新 module
for (var updateModuleId in appliedUpdate) {
  if (__webpack_require__.o(appliedUpdate, updateModuleId)) {
    __webpack_require__.m[updateModuleId] = appliedUpdate[updateModuleId];
  }
}

// 更新 runtime
for (var i = 0; i < currentUpdateRuntime.length; i++) {
  currentUpdateRuntime[i](__webpack_require__);
}
// 调用 accept 的回调
for (var outdatedModuleId in outdatedDependencies) {
  if (__webpack_require__.o(outdatedDependencies, outdatedModuleId)) {
    var module = __webpack_require__.c[outdatedModuleId];
    if (module) {
      moduleOutdatedDependencies =
        outdatedDependencies[outdatedModuleId];
      var dependenciesForCallbacks = [];
      for (var j = 0; j < moduleOutdatedDependencies.length; j++) {
        var dependency = moduleOutdatedDependencies[j];
        var acceptCallback =
            module.hot._acceptedDependencies[dependency];
        if (acceptCallback) {
          if (callbacks.indexOf(acceptCallback) !== -1) continue;
          callbacks.push(acceptCallback);
          dependenciesForCallbacks.push(dependency);
        }
      }
      for (var k = 0; k < callbacks.length; k++) {
        // 触发回调
        callbacks[k].call(null, moduleOutdatedDependencies);
      }
    }
  }
}

// module.hot.accept() => 重新加载自身 module
for (var o = 0;o < outdatedSelfAcceptedModules.length;o++) {
  var item = outdatedSelfAcceptedModules[o];
  var moduleId = item.module;
  item.require(moduleId);
}
hash 更新
每次请求的json文件都是之前编译的hash。等到模块加载完毕,根据runtime更新对应的hash值。 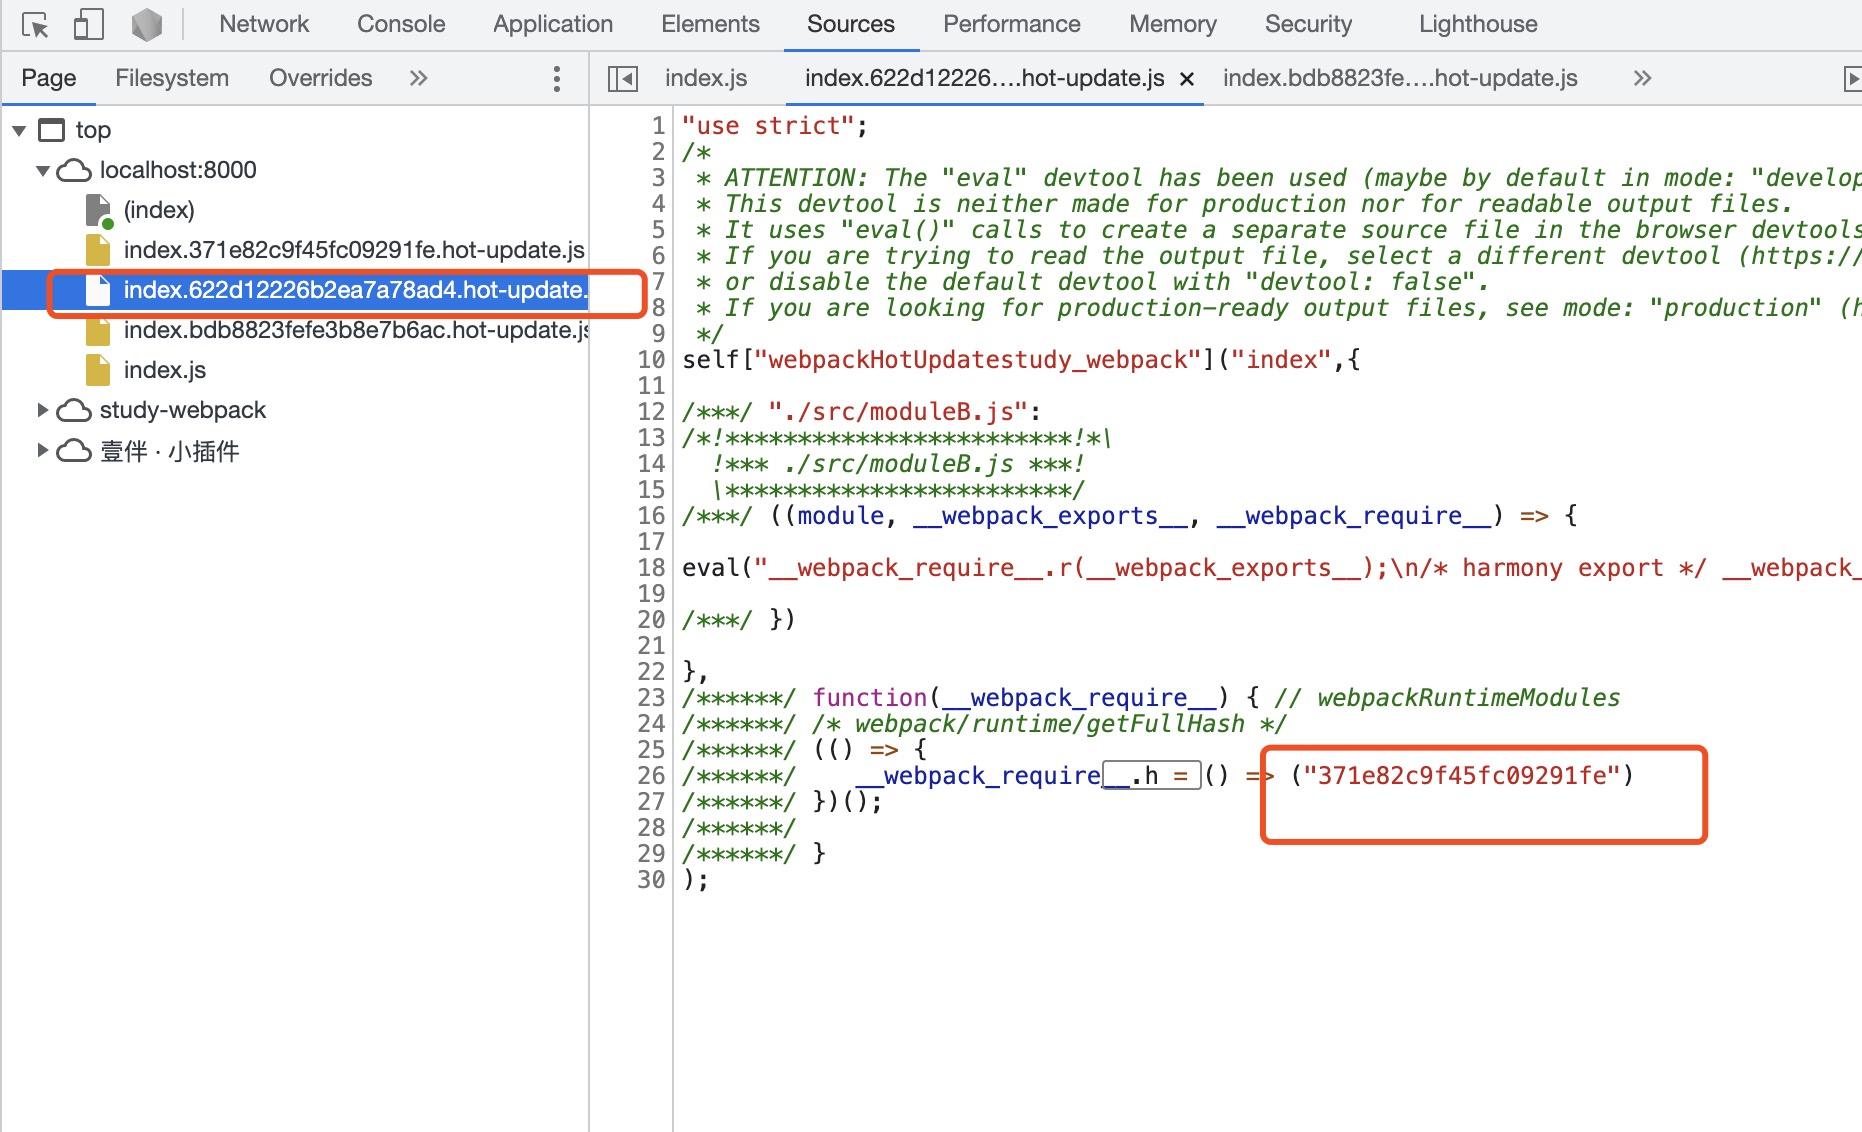
总结
热更新流程如下:
compiler.watch监听文件变化,如果变化,开始重新编译。编译过程中:
- 首先新增两个
entry:一是WebSocket的客户端,用于接收服务端的通知;二是webpack的dev-server,用于监听webpackHotUpdate事件。 - 通过
HotModuleReplacementPlugin插件,对比编译后的chunk和module,将更新后的module和runtime形成新的HotUpdateChunk。最终将该chunk输出到hot-update.js文件中,而将变化的信息输出到hot-update.json文件中(都在内存中)。 - .
HotModuleReplacementPlugin插件还会为"bundle"添加处理更新的代码 ——HotModuleReplacement.runtime.js和JavascriptHotModuleReplacement.runtime.js文件。module.hot等api均在这里定义。
- 首先新增两个
编译完成后,触发
hooks.done钩子。webpack-dev-server接收到编译完成事件,通过服务端server向客户端发送更新通知。客户端接收到服务端通知,调用
reloadApp方法触发webpackHotUpdate事件,webpack的dev-server监听到该事件。客户端开始进行
hotCheck:- 根据
fullhash通过fetch向express请求hot-update.json文件。 - 根据
hot-update.json中改变的chunk的id,请求对应的hot-update.js文件。 - 执行
hot-update.js文件中的代码,将更新后的module和runtime存到currentUpdate和currentUpdateRuntime中。
- 根据
客户端开始进行
hotApply:- 遍历
currentUpdate,根据用户定义的module.hot相关的api,确认更新的module和runtime。 - 调用
dispose方法,遍历待更新的module,移除原有的module定义。 - 调用
apply方法,添加待更新的module的最新定义,并触发module.hot.accept回调。
- 遍历